Posted by: Rick
There were a handful of projects that were critical to our plans for a safe and comfortable winter off-the-grid: an escape plan (the Polaris Ranger), sufficient wood for heating (we are working on it!), guaranteed electrical power (after all, watching TV may be all we can do), storage for food and supplies...
Yesterday, the backup propane generator became fully functional. That's probably enough news for many of you. But, for those who may be curious about more details, here goes.
The generator is a Kohler 14KW residential backup generator. We installed it on a concrete pad behind the small storage shed just outside the cabin. We installed a 500 gallon propane tank that will supply the generator as well as a second (backup?) fridge in the shed.
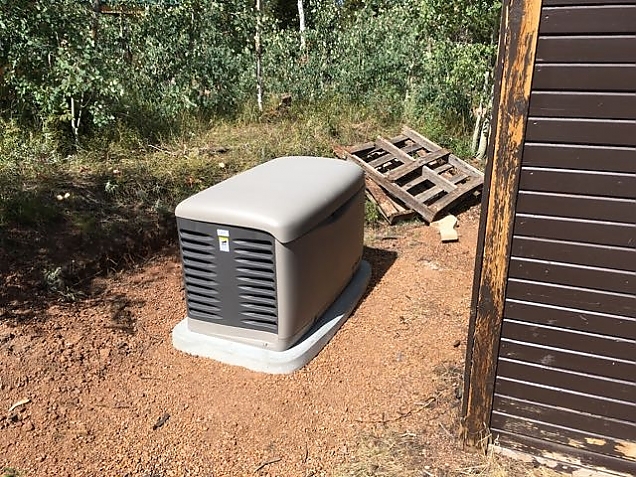
Kohler 14KW backup generator behind the shed (which I promise to paint soon).
The generator outputs 240VAC, and my inverter inside the cabin takes 120VAC on its AC inputs (typically, one for grid connect and a second for a generator), so there is a 240VAC to 120VAC transformer in the shed. We used existing wiring from a previous 6KW gasoline generator that I stored in the shed to bring the 120VAC to the cabin.
All that work got done a few weeks back, so we've had a backup solution since then, but it required manually starting and stopping the generator (which we have never had to do, so far).
Yesterday, we dug a second trench between the shed and the cabin for a "sense wire" run. This is a wire (two, really) that runs between the inverter inside the cabin and the generator and allows us to control the generator from the inverter, either manually or automatically.
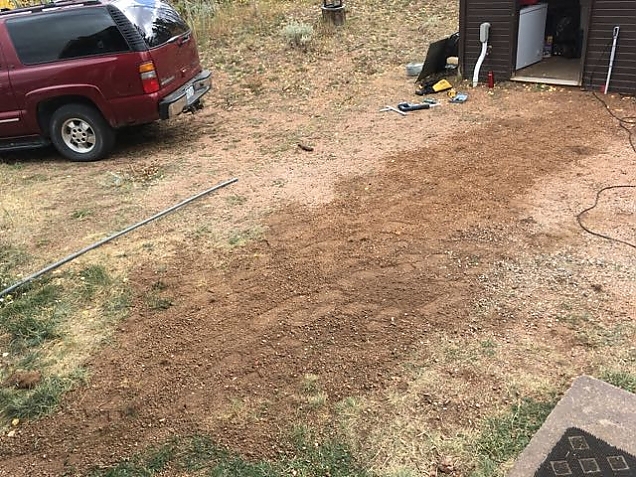
We dug a trench between the shed and the cabin for the sense wire. It is covered back up in this photo.
The inverter is the electronics inside the cabin that converts the direct current (DC) battery power into alternating current (AC) house power. The batteries are 24VDC and we need 120VAC in the cabin. In addition to converting DC to AC, the inverter has the ability to take power in from the grid (does not apply in our case) or from a generator and use that to charge the batteries. And, it provides a number of generator management capabilities.
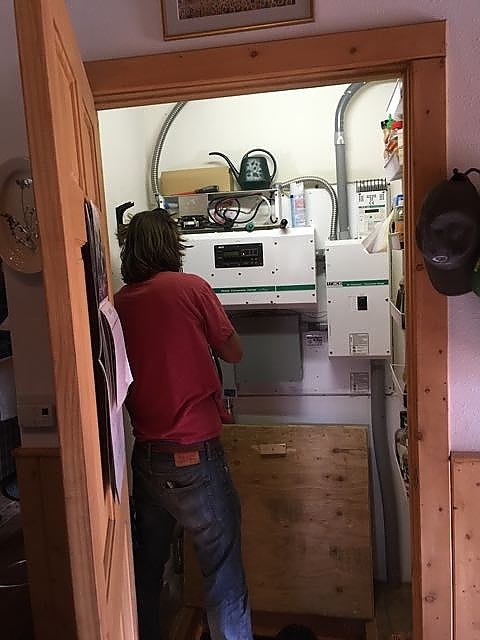
Here, John is wiring the sense wire into the inverter which is located in a utility closet in the cabin.
The inverter controls the generator with a relay closure. That is what the "sense wire" really is, just a wire that connects that relay to the generator. The generator is smart enough to sense the closure of the relay and knows to start automatically. The generator is set up to turn on and off automatically, and includes a starter battery (as well as a small battery charger, a fuel line heater, etc.)
The inverter also has a number of scenarios you can program to control starting (and stopping) the backup generator. These include:
Any time the cabin draws 33 amps AC for more than 2 minutes, the generator will start up to provide current above and beyond what the batteries are providing. This is mostly to protect the batteries from a quick discharge. I doubt we'll ever see this happen since our normal load is between 2 and 3 amps. But, I suppose if we ever had the water pump running (12A), and the vacuum cleaner (7A), and the microwave (10A), while the toaster was running (7A), it could happen. Of course, they would all need to be running for more than 2 minutes.
If the battery voltage stays at or below 24.0 VDC for a 24 hour period, the generator will start.
If the battery voltage stays at or below 23.6 VDC for 2 hours, the generator will start.
If the battery voltage stays at or below 23.0 VDC for 15 minutes, the generator will start.
(All the above are programmable.)
Finally, if the battery voltage drops below the Low Battery Cutout Voltage (LBCV) of 22.8 VDC for more than 30 seconds, the generator will start. This is the voltage at which the whole system "gives up" and cuts off and we lose electricity. This has never happened to us while living in the cabin, but I know it has happened over winters when the cabin was vacant. Interestingly, we have had no power outages while living "off the grid", yet when living in NJ, we had frequent power outages, some lasting as long as a week (superstorm Sandy impact, for example).
In all cases, once the generator starts it will run until the batteries are fully charged or 4 hours, whichever is less (or, until we turn it off manually). Given that it is capable of supplying about 50A AC in total, with about 30A AC (that's about 125A DC at 28VDC) for charging the batteries, the job should get done in less than 4 hours. (I typically want to provide sufficient current to bring the batteries to a bulk voltage of 28.8VDC, hold them there for 1 hour, then float them at about 26.8VDC for a couple of hours to get a full charge.)
For the engineers in the crowd, yeah 50A does not sound like much from a 14KW generator. But, a propane generator loses about 5% of its energy output for every 1000 feet in altitude. So, at about 8500 feet, the generator output is degraded by around 40%. It could do a bit better than 50A output, but why push it? The inverter won't charge with more than 35A in any case.
One final note to this post. While we had the trencher (loaned by a neighbor and also used to dig post holes for the wood shed, which you can read about in a future post), we ran two strings of conduit between the cabin and the new barn. I plan to pull a 15A run through one of them so that we have one AC circuit available in the barn. The second conduit is for "future proofing". My contractor insisted on it even if we are not planning to use it. As she said "once you have the trench in the ground, you should put lots of stuff in it that you might want in the future". The second conduit could be used for a second circuit, larger wire, or who knows what in the future. Good idea.
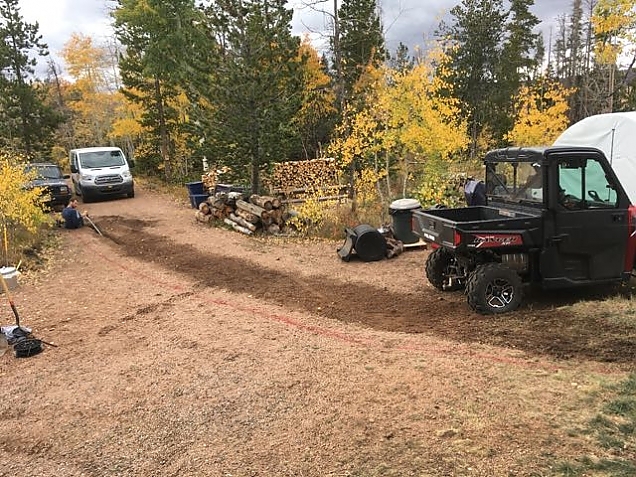
Conduit run to the barn (trench is already covered up).
Posted by Rick on 09/25/2016 at 07:14 AM
Tags:
cabin,
projects,
power
Filed under:
Projects
Permalink
Posted by: Rick
This post is at risk of becoming a rambling mess. But, I'll do my best.
First, we've been neglecting the blog for the past week or so. Not because we don't want you to keep up with our adventures, but because we've been busy, busy, busy.
We cut wood on Labor Day, but did not make as much progress as we hoped. It seems the "sawing" part was becoming more and more difficult.
On Tuesday, we took Destin to the vet to get his rabies shot, and had to leave him there for a while so they could work that last minute request into their schedule. We drove in separately, me in Big Red and Lynne in Lex because Big Red was headed in to service (again).
On the way, I stopped at the Saw Shop at Heggie Logging Company to drop off a chain saw chain to be sharpened. I figured that might be the problem with our sawing troubles. Sure enough, John took one look at the chain and decided I needed some serious saw maintenance lessons. John kindly and patiently showed me why my saw was not cutting very well, and why, when it did cut, the cut was not straight but rather curved downward through the wood. (One side of the chain is more worn than the other and not all the cutting teeth are the same size and sharpness.) The chain was in serious need of reconditioning. He went on to show me the proper way to sharpen the cutting teeth (which I pretty much had down), but also how to test the height of the rakers and file them to the right height. I'm not going to go into how a chain saw works, so you can look up these terms on Wikipedia. John also showed me how to change a chain. (I actually have a new chain that I've never used.) Later, when we finally got home, I put the new chain on the saw, and wow! does that make a difference. I think sawing will go back to being fun now. I left the old chain with John to be reconditioned and I'll pick it up in a few days (and take him the chain from my second saw).
So, back to our Tuesday: dropped off dog, learned a lot about chain saws, dropped off Big Red to get the blower controls fixed, shopped at WalMart, picked up the dog, took the dog to ACE Hardware to pick up some paint for the shed, and came home. It was a longish day and Destin got some experience riding in the truck. He really likes it when we pass by cows.
Wednesday, we got up at 5:00 a.m. and headed out to pick up our new refrigerator and stove at a propane supply place in Longmont, Colorado. Destin went with us. We had hooked up to a borrowed trailer the night before, so we got away from the house about 5:40. It was just a little less than 3 hours to make the drive. We got the new appliances loaded in the trailer and headed back. I decided to take back roads rather than go all the way back out to I25 and up to Owl Canyon Road where we could cut over to Highway 287. Let's just say that a tall refrigerator, tied down to a short trailer on some of the more "curvy" back roads led to a few moments of panic (only if I looked in the rear view mirror). But we made it home okay.
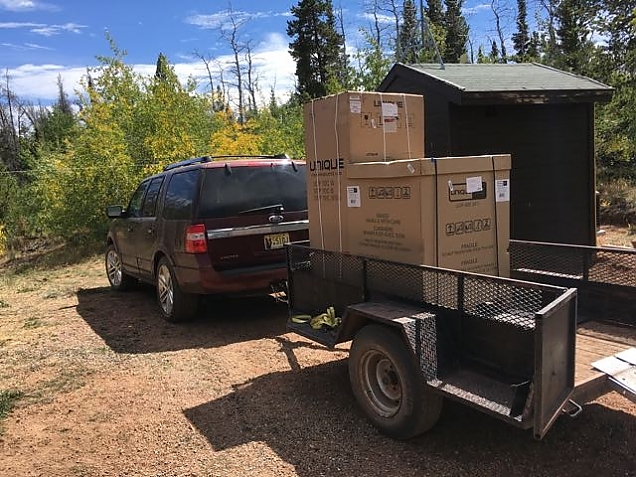
A long day, but we still needed to unload the appliances and get them inside in case it rained. That was a bit of a challenge, but between Lynne, me, a hand cart and some ramps that I borrowed, we got it done. Destin was one pooped pup.
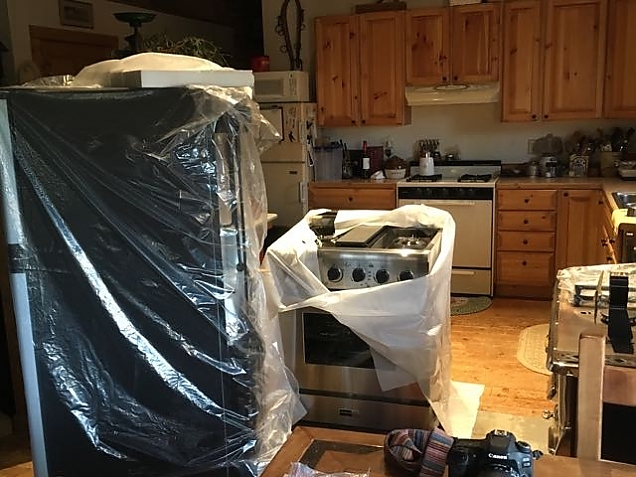
Why new appliances? We were really tired of cooking on our antique Amana range. The burners (of which only 3 of 4 worked) had two settings: high and off. And, we need a second refrigerator. So, the idea was to get a new range and refrigerator, put them in the cabin, put the old refrigerator out in the shed as a second fridge, and donate the Amana range to a charity that can fix it up and use it.
We did a lot of research on propane appliances and decided to get the new ones from Unique, a Canadian company that provides high-end off-grid appliances. We could only get them from dealers in the US and the two closest were in Rawlins, WY or Longmont, CO. Obviously, we went the Longmont, CO route.
On Thursday, Tim from Suburban Propane in Laramie came up to install a new 500 gallon propane tank and plumb it to the propane generator. (Yeah, we are still working on getting it fully commissioned.) While here, he helped us install the new appliances. The range went in reasonably well. It "just fits" and I think I need to plane the sides of the cabinets some to get it further back by about 1 inch. And, it works great. I think we will love it. The refrigerator is another story. We got it hooked up, and while it is a bit taller and deeper than our old one, it fits okay. The problem is that we simply could NOT get it to light.
To light a propane fridge, you need to press on a button that allows the flow of a small amount of propane to a starter burner (a pilot light, of sorts). Then, you press another button at the same time that creates a spark to ignite that propane. As long as you hold in the first button, it will burn. As it burns it heats up a sensor that eventually will open the flow of the main propane source allowing the fridge to work. Well, on ours, that sensor must not be working. No matter how long we held in the button, when we let go the pilot light would go out.
Since the fridge can also work on electricity, we plugged it in and started cooling it off that way. (All our food was in a huge cooler we have.)
When I woke up on Friday morning, I was a bit shocked to see that the batteries were down by almost 300 amp-hours. Normally, they are down about 100 amp-hours from overnight. (For the geeks, that is 300 Ah at about 25 volts average, so roughly 7.5 killowatt-hours.) They got (almost) a full charge on Friday while we were at a dog show in Greeley, Colorado.
While at that dog show on Friday (and that is a whole different post, but the third day with Destin on-the-road), I called Unique and eventually spoke with their support guy, Tim. He seemed to think I am suffering from a problem they've seen before that could be the result of poor grounding, or insufficient microvoltage to the whatchamacallit, or a a bad thermocouple, ... He sent me "detailed" troubleshooting and repair instructions by email that I was able to study once we got home.
Hmmm, seems I have to tip the refrigerator on its side to get access to all the gadgets I'm supposed to fart with. Emptying the fridge again is not a big deal. But, the propane tubing isn't long enough to allow this. So, I'd need to disconnect the propane supply, tip the fridge on its side. Fart around with various components looking for shorts and microvolts, etc. Then, I guess, tip it back up, reconnect the propane, check for leaks, etc., and try to start it again. Whoa! I think I need professional help! Not sure where that is going to come from. I wrote Tim at Unique an email expressing my frustration. And, I'll call Suburban Propane's Tim on Monday and beg for help.
Meantime, that fridge is sucking electricity like crazy.
Could just run the generator, right? But, it is still not fully hooked up. So, we are praying for long, sunny days and conserving as much as possible.
I'll update this post in the future to complete the story.
Meantime, here is what our new appliance look like (mostly) installed. The fridge still has protective film on it and I don't want to take that off until I'm done tipping it over.
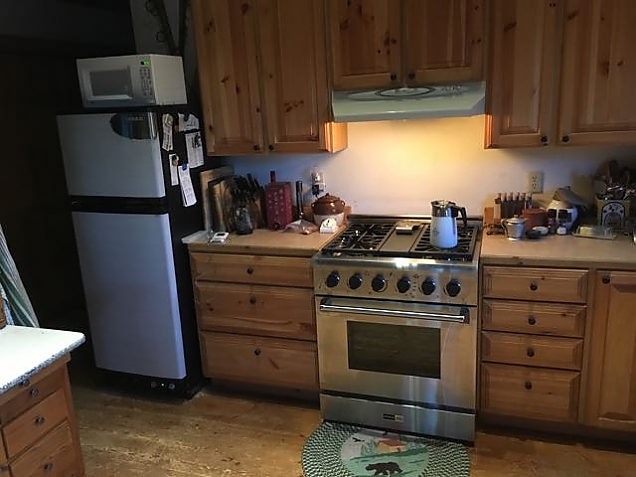
Posted by Rick on 09/10/2016 at 01:25 PM
Tags:
cabin,
photos,
dogs,
projects
Filed under:
Everyday Life •
Projects
Permalink
Posted by: Rick
Today, we got up a bit early, showered, fed the dogs, brewed some coffee, and took off in Big Red (our 2002 Suburban) for the "big city". We took Cherokee Park Road to Highway 287 and then down to Fort Collins. The goal of the day was to get our Colorado driver's licenses and register Big Red.
I had done a lot of web research and thought we were in pretty good shape (with a few exceptions).
First stop was the emissions testing facility who could also provide us with a VIN verification, needed for the truck registration.
Next stop was the DMV to get our licenses. I knew we needed to establish our identity (passports worked for this); legal driving credentials (our NJ license worked for this), and our residency. And, for some reason we had to show that our Social Security number was, in fact, ours.
Establishing residency--that we are living in Colorado--was the stickiest issue. Typically, they want at least two forms of proof of residency and they have to be within the past 12 months. Utilitity bills, rent receipts, etc. all work. Really, almost anything that is mailed to YOUR NAME at YOUR ADDRESS is okay.
Nothing gets mailed to our address. Remember, there is no mail service to our Colorado address. Instead, we get our mail on a rural route in Wyoming. Hmmm.
I was able to show my W2 with my legal name and Social Security number on it. Check. Passport to establish ID. Check. I had an invoice from our home owners insurance that showed the "covered address" and it was addressed to both Lynne and me. Check. And, I had a property tax notice that, of course, had the physical address. Check. I was in!
Lynne happened to see a different "agent" and that did not go as well. First, she has no proof of her SS number. How many people still have that little cardboard card with their number on it? And, she had no W2 or other proof of her SS number. However, she was "still in the system" from having had a driver's license in Colorado 10 year ago, and they accepted that. Along with her passport, ID was established. Check.
The problem was that the same documentation that got me through, did not work for Lynne. Turns out the tax notice (along with some other documents like building inspections, etc.) were all addressed to our living trust, not us as individuals. My agent had accepted that, but Lynne's (and the supervisor) did not. We did not have that second piece of documentation that Lynne lived at our address.
I got a bit hot under the collar about this. "I got my license. I used these documents. Why can't she also use these documents? She is my wife! She lives with me!" Nothing worked. They would not budge.
I showed them our Certificate of Trust that shows that we are both trustees of the trust and thus the trust and us are the same. If you did not understand what I just said, don't worry, neither did they! And, the trust documentation is from 2012, so more than 1 year old, so not valid for their purposes...
They suggested we go to our bank and have them print some kind of document that showed our physical address (since they are required by law to have it). But, all our bank accounts are associated with the living trust. Won't work.
I kept jumping back to the front of the line to suggest another alternative to the supervisor. "What if I write a rental agreement here on a piece of paper, renting our property to Lynne? Then, I sign it and she has the document she needs?" (This has worked for others, we hear.) Nope, it would have to be a legally drawn up agreement, etc. etc.
Finally, the supervisor saw our Colorado State Farm insurance card for Big Red, that I had in the same stack of papers I was riffling through to try to prove that my wife lives with me at our home with no mail service to its legal address. He suggested that I call my insurance agent and have them print out "something" that shows both our names as well as both our addresses (legal and mailing). I called our agent in Loveland. She emailed me a screen shot from her computer that showed this info. I took my phone up to the front of the line and showed the email message to the supervisor. He bought it! Actually, I think he was pretty sympathetic to our problem (off the grid, no mail service to our legal address, mailing address in a different state, stuff in my name instead of both our names, the trust owning most assets, etc.) and just wanted to get rid of me. (People were getting irritated that I kept jumping the line to talk to him.) I don't think he even looked at the email message. Click, click, click on the keyboard and Lynne had her license.
The truck registration went pretty well. I wanted to use our old plates from 10 years ago, but they were too old. Too bad. I could remember that license plate number! The agent was a bit confused by two addresses, one in Colorado and one in Wyoming. But, she got us through the process and we still got a pretty cool license plate number. And, it turned out we did not need an emissions test since we did not live in the city limits. (Very weird to me, but okay.)
Lunch at Culvers. Washed the truck. Gas at Jax and we headed home.
Next step is to register Lex. But, that should go well given we've learned the ropes.
We now have (temporary) Colorado driver's licenses!
Posted by Rick on 08/30/2016 at 05:55 PM
Tags:
projects,
mail,
address
Filed under:
Everyday Life •
Projects
Permalink
Posted by: Lynne
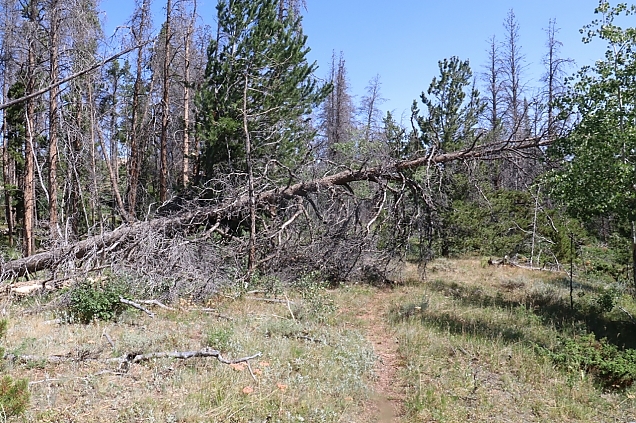
As you already know, we have a huge amount of beetle-kill on our land. It's sad when another once-beautiful stately pine gives up and succumbs to gravity. Last week we came home from being in town and I looked out the window and the view just didn't look right. I said to Rick, that tree wasn't down before was it? No, it wasn't and it's a biggun. But at least the trees that are dead and eventually fall will go on to keep us warm and cozy in the winter. Gathering wood is essential to our lifestyle, and it also keeps the ground clear of fallen trees.
Here Hailey demonstrates where the tree is in regards to the cabin. I think we are leaving the tree right where it is for now and we have plans for how to use it —maybe a sign for our new (yet to be done) gate post? Maybe some furniture? Two people close by have a sawmill that would make quick work of it. And, the wood is so lovely.
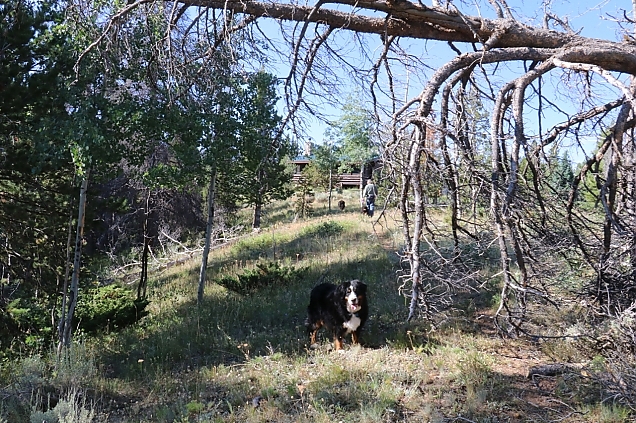
We still have a huge stack of logs from the cutting of the trees in the meadow that are close to the cabin. We decided that instead of taking the easy way out and using that stack we would go further into the meadow and harvest from there for now since in winter it will be covered in snow and unreachable. Better to save the close-in wood for a winter emergency stash. We also need to get the darned wood shed built, and now that our propane generator is delivered and in place we'll soon be able to start on it once the propane tank is delivered, which we are hoping won't be too long from now.
We posted a week or so ago about putting up wood and here is how it looked then. I thought you might be interested in seeing the steps that go into that nice neat stack of wood. Well, okay, I admit it's not as neat as I would like it. It kind of leans and takes a turn in the middle. But, hey.
This is a load of logs that we cut down in the bottom of our property from a large tree that had fallen over years ago and also what was left of two trees that were leaning over the road that our neighbor Mark (who owns land above us) cut down. We told him he could have the wood if he wanted it, and then he left us a couple of logs.
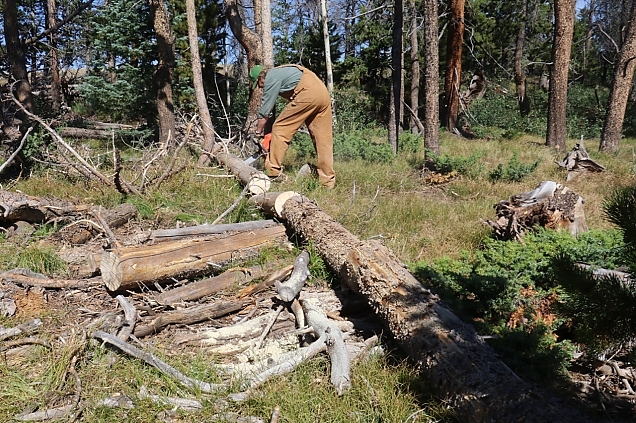
Here is Rick sectioning out a large tree (already fallen) into logs out in the meadow.
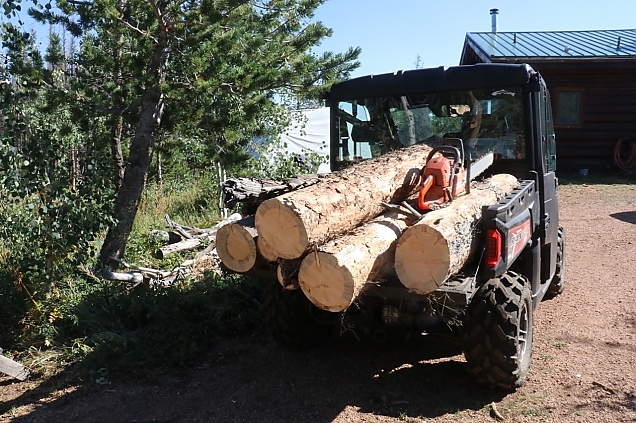
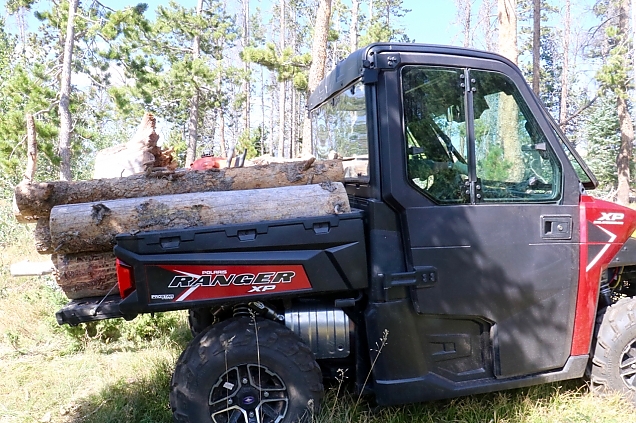
Our bounty from the meadow loaded up into MM (Mountain Mia, as we call our Ranger). Again, some pretty hefty logs!
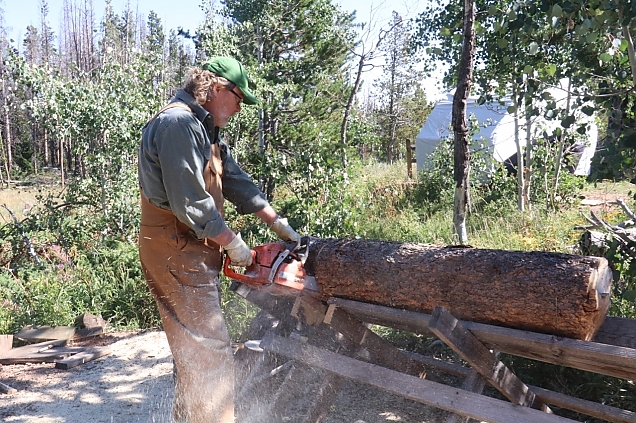
Next comes the smaller sectioning of logs in prepartion for the splitter. We cut the log lengths into smaller segments that will fit into our wood stove. Longer pieces can be burned in the fireplace. It's a messy process and the reason why we wear overalls when doing this part—sawdust everywhere! Rick runs the saw and I push the log into place for him with each cut.
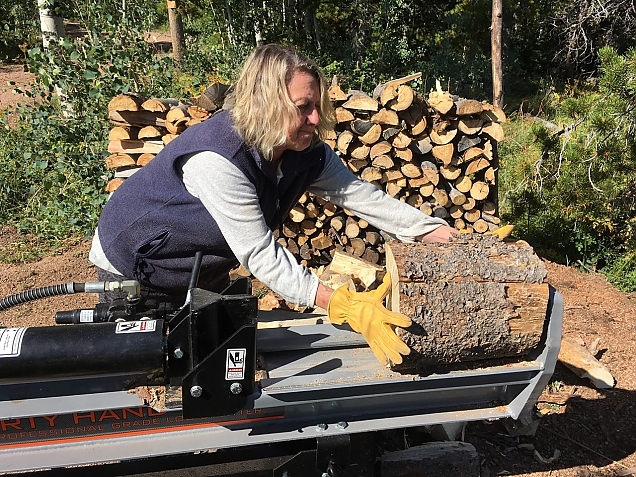
Next comes the fun part — the splitting! Having the splitter makes it so easy. Some of the bigger logs need to be cut into six or eight pieces, depending on the size of the tree. Make a split, put it back on, split it again! This one I think we ended up splitting six ways. I love running the splitter, but sometimes I load the logs onto the splitter and Rick splits. Either way, with two people working the time passes quickly and pretty soon you have a wonderful piney-smelling big stack of lovely split wood! (see next photo).
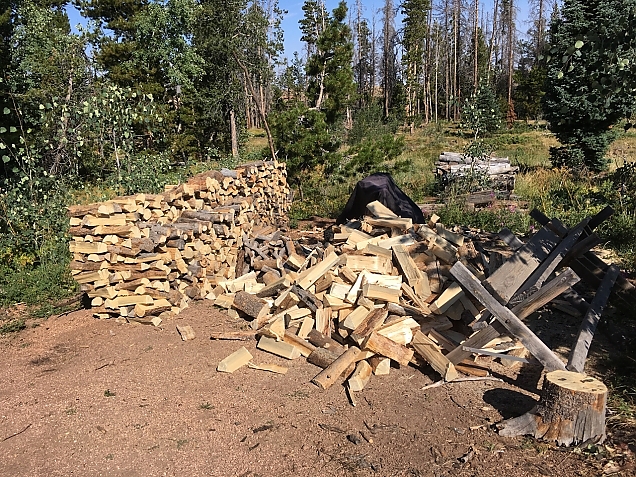
Here is all the wood after it's been split.
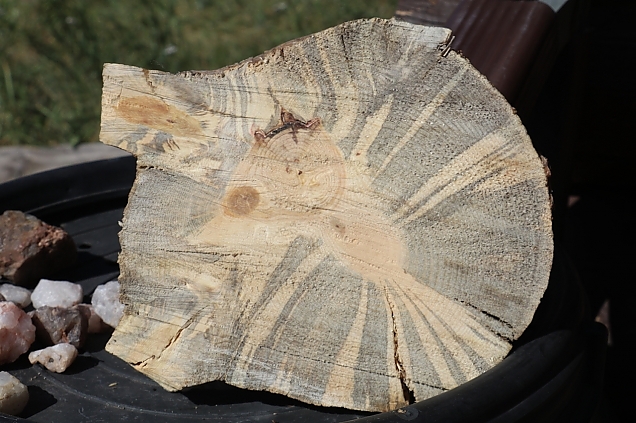
It's not only fun (well, I think so) but a good workout for the abs and everything else. Plus, you get to see and feel the wood up close. All this wood is beetle kill which gives it layers of blue-ish-gray rings. When it's cut into lumber it makes cool stripes. We found all kinds of funny things inside the trees marking-wise. Some had a yellow laquer and funny holes. Some bark had what I like to call "ancient tree writing" on it, which I think are just simply bug tracks. It looks like tree hieroglyphics to me. And some pieces just had ants. Tons of red ants, some of which ran down into my overalls biting at my tender flesh. Damn things.

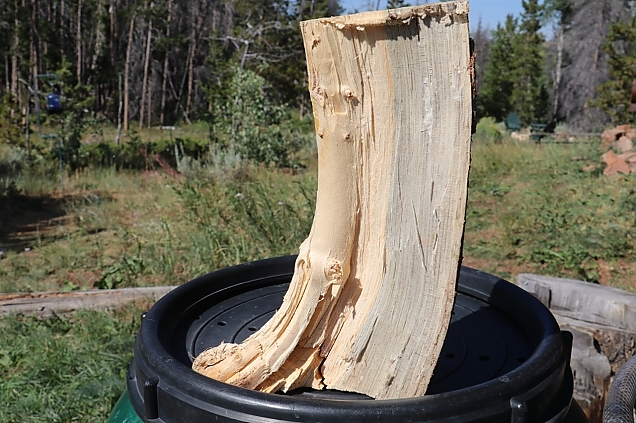
Sometimes I see wood that I want to keep which drives Rick crazy. I have a pair of "boots" that I use as bookends. I also kept this slab of wood because this tree had two hearts and a beautiful beetle pattern. Rick is going to sand it down for me and then I think I will shellac it and display it.
Another find of mine from this batch of wood, is this single boot. I liked it because it does look like a cowboy boot and the heart of the tree is so lovely and round on the front of the boot.
After all the gathering, sectioning and splitting comes the stacking. Of course. Here is our finished stack of wood which is about a cord and half, with another 2/3 cord on the front porch.
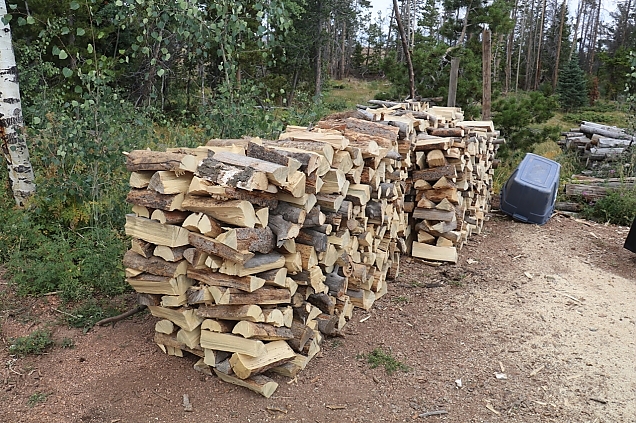
Yes, it does seem like ALOT of work, doesn't it? But there is something very satisfying about working with wood and knowing that all your hard work now will pay off in the winter when you are sitting around a toasty wood fire nodding off for a nap with your book in your lap. That, and that you can stand back and look at what you've accomplished —just you and no middle man. Making use of what nature left behind. I am thinking it's a good thing and well worth the effort.
Posted by: Rick
I figure we'll need 7 to 8 cords of wood for winter. And, maybe a bit more "around the edges" at the start and end of colder weather. So, the strategy is to put up a cord of wood each week during August and September, and then opportunistically cut more if we get the chance.
A cord of wood is 128 cubic feet of wood. This is usually figured as three rows of 16" logs stacked 8 feet long and 4 feet high. That's 4x4x8 or 128 cubic feet.
A few days ago, Lynne donned her overalls, I got out the saw and fired up the splitter and we did a cord. Two-thirds of it is stored on the front porch (which my "fire wise" friends will point out is a bad idea, but when it is -20° outside and the wind is howling, it is nice to have a stash on the porch). The other 1/3 is in a temporary stack awaiting the construction of a wood shed.
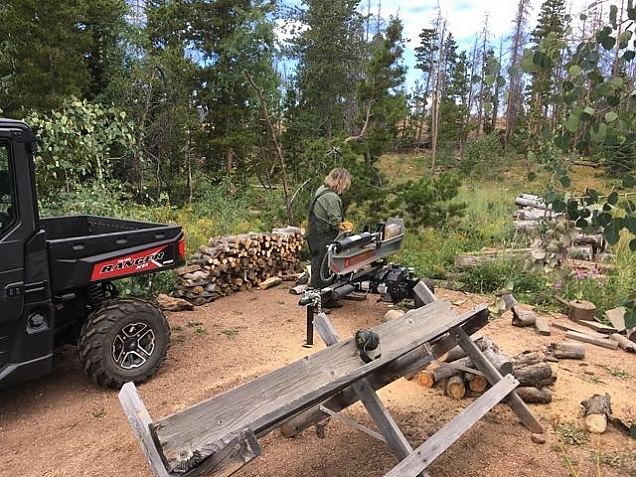
Here is a photo of our wood cutting, splitting and stacking setup (note the large pile of logs in the center-right of the photo):
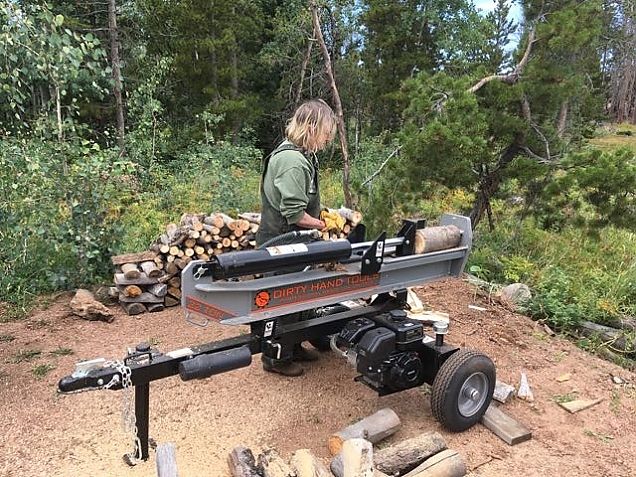
Lynne "manning" the log splitter:
Two-thirds on the porch:
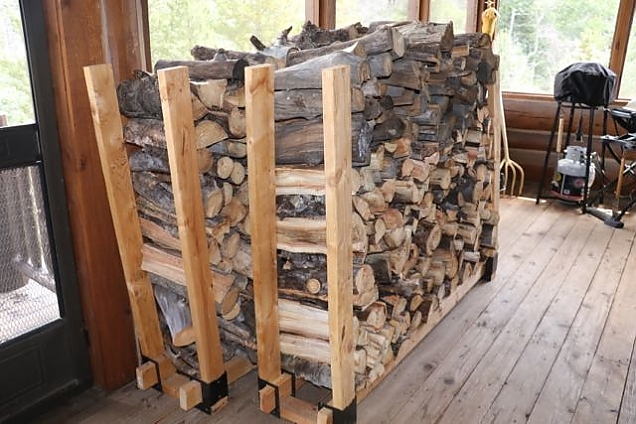
The final third stacked. More to join this stack soon!
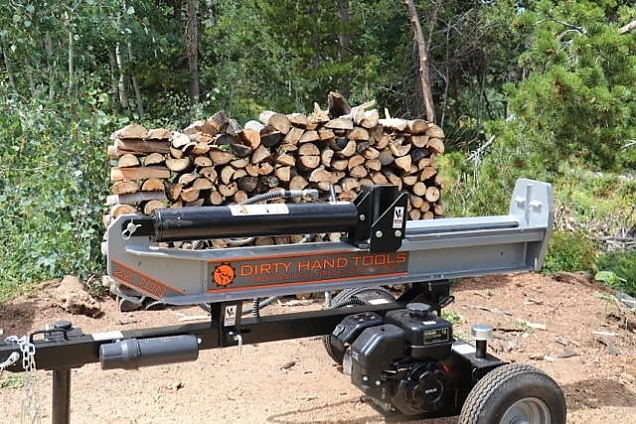
We love our new log splitter (built right here in Colorado). It works like a charm.
The next step is to sharpen the blade on the chain saw and do another cord this weekend.
Posted by Rick on 08/10/2016 at 08:40 PM
Tags:
photos,
winter-prep,
activities
Filed under:
Everyday Life •
Projects •
Summer
Permalink
Page 4 of 8 pages
‹ First < 2 3 4 5 6 > Last ›


